Hey there! As a supplier of Colorful Non-Woven materials, I'm super excited to share with you how to make a colorful non-woven photo frame. Non-woven materials are not only eco-friendly but also very versatile, making them perfect for DIY projects like this one.
Materials You'll Need
First off, let's talk about the materials. You'll need some colorful non-woven fabric, of course. The great thing about non-woven is that it comes in a wide range of colors, so you can really get creative with your design. You'll also need a pair of sharp scissors, some glue - I recommend a hot glue gun for a strong hold, but regular craft glue works too - a photo of your choice, and a ruler or a straight edge to help you make straight cuts.
Measuring and Cutting
The first step is to measure your photo. You want to make sure your frame is big enough to hold the photo but not too big that it looks out of proportion. Use your ruler to measure the length and width of the photo. Then, add about an inch or two (depending on how wide you want your frame to be) to each side. This extra space will give you room to create the frame.
Once you've got your measurements, use your scissors to cut the non-woven fabric. Cut two rectangles: one for the front of the frame and one for the back. Make sure the rectangles are the same size. If you're using different colors for the front and back, this is the time to choose your favorite combinations.
Creating the Frame Structure
Now, it's time to create the frame structure. Take one of the rectangles and fold it about half an inch in from each side. This will create a sort of border around the rectangle. Use your glue to secure the folds in place. You can do this by applying a small amount of glue along the edge of the fold and then pressing it down firmly. Repeat this process for the other rectangle.
Next, you'll want to create the corners of the frame. There are a few different ways to do this. One method is to cut small triangles from the corners of the rectangle where the folds meet. Then, fold the corners over and glue them together. This will create a nice, clean corner for your frame. Another method is to simply overlap the folds at the corners and glue them together. Both methods work well, so choose the one that you find easiest.
Attaching the Photo
Once you've got your frame structure ready, it's time to attach the photo. Place the photo in the center of the front rectangle. You can use a small amount of glue to hold it in place temporarily. Make sure the photo is centered and straight. Then, take the back rectangle and place it on top of the photo and the front rectangle. Align the edges carefully and use your glue to attach the back rectangle to the front rectangle. Press down firmly to make sure the bond is strong.
Adding Finishing Touches
Now that your photo frame is basically complete, it's time to add some finishing touches. You can decorate the frame with all sorts of things. For example, you could add some beads, sequins, or ribbons. You can use glue to attach these decorations to the frame. You could also use fabric paint to add some designs or patterns. Get creative and make your frame unique!
Why Choose Colorful Non-Woven for Your Photo Frame?
Colorful non-woven materials offer many advantages. They are lightweight, which makes them easy to handle and hang on the wall. They are also durable, so your photo frame will last a long time. Plus, non-woven fabric is easy to work with, even if you're a beginner at DIY projects.
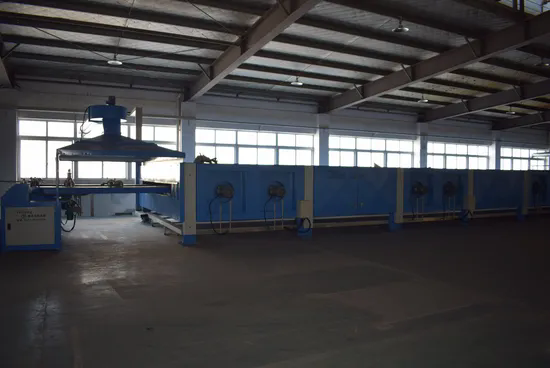
If you're interested in producing non-woven materials on a larger scale, we offer a variety of high-quality non-woven machines. For instance, the High Performance Needle Punching Felt Machine is a great option for creating strong and durable non-woven fabrics. The Production Line Needle Punched Felt Machine is perfect for mass production, and the Non-Woven Nonwoven Machine offers versatility in creating different types of non-woven products.
Contact Us for Your Non-Woven Needs
If you're looking to source colorful non-woven materials for your DIY projects or for commercial use, we're here to help. We have a wide range of colors and qualities available, and we can provide you with the best prices and service. Whether you're a small business owner or just someone who loves to craft, we can meet your needs.
So, if you're interested in purchasing our colorful non-woven materials or learning more about our products, don't hesitate to get in touch. We're always happy to answer your questions and discuss your requirements.

Conclusion
Making a colorful non-woven photo frame is a fun and rewarding project. It allows you to express your creativity and add a personal touch to your photos. With just a few simple materials and some basic DIY skills, you can create a beautiful and unique photo frame that you'll be proud to display.
I hope this guide has been helpful to you. If you have any questions or comments, feel free to leave them below. And remember, if you're in the market for high-quality colorful non-woven materials, we're here to assist you.
References
- General knowledge about non-woven materials and DIY projects.
- Experience as a Colorful Non-Woven supplier.